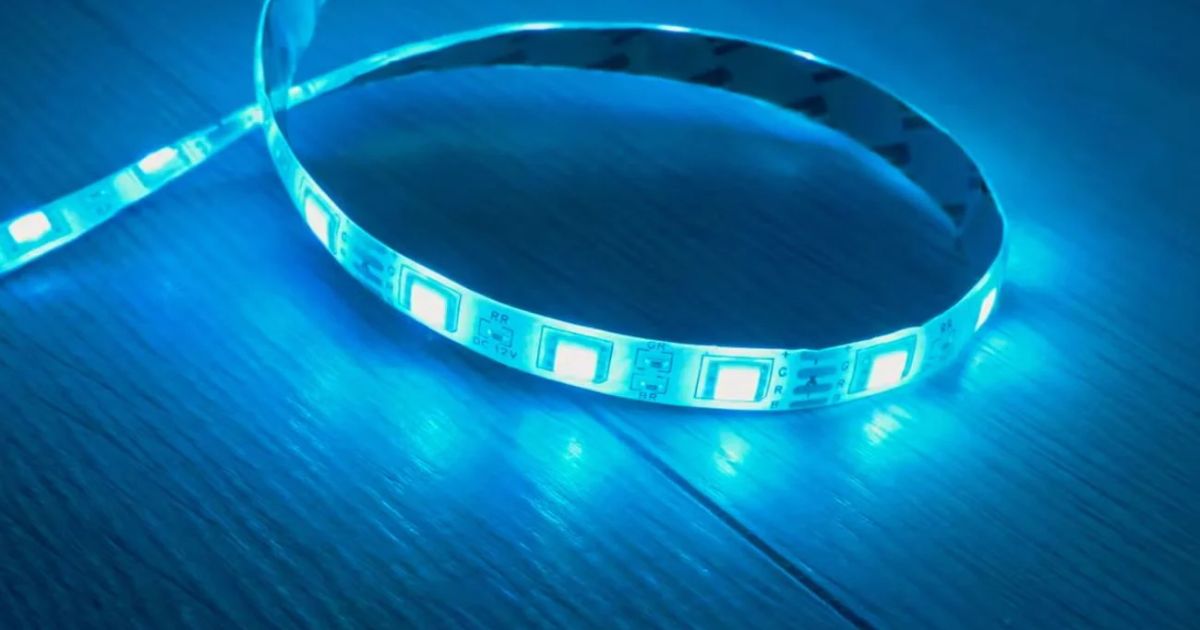
LED strip lights are a versatile lighting option for homes, but they can develop problems that cause them to stop working. In this guide, we will provide troubleshooting tips to identify common issues with LED strips that won’t turn on and give solutions for fixing them.
Have you come home to find your colorful LED strip lights dark and unlit, leaving you wondering what happened? Don’t panic – with some basic troubleshooting and repairs, you can often get your strips working again without needing to replace the whole string.
The first step is to methodically diagnose the problem by testing different areas of the light strip. Narrowing down where the issue occurs helps identify whether it’s a faulty LED, bad connection, or power supply problem that is preventing the lights from illuminating as expected.
Common Causes of LED Strip Lights Not Working & How to Diagnose
One of the most common issues is simply a burned-out LED chip. LED Lights Attract Over time, the tiny integrated chips can fail, leaving dark spots along the strip. You’ll want to methodically check each LED for continuity with a multimeter. Another frequent problem is loose or broken connections between the chips or to the power supply. Flexing of the strip over time can cause cracks in the solder masks. Inspect all connection points under magnification for signs of damage.
Failed LEDs or Drivers
Burnt-out or damaged LED chips are obvious culprits if you see dark spots along the strip. Use a multimeter to test for continuity – a broken circuit at an LED means replacement may be needed. Drivers can also fail over time, cutting power to downstream lights on the circuit.
Broken Connections
Look for loose, disconnected, or cracked solder joints between individual LEDs or at power connection points. Bends or crimps in the flexible circuit that disrupt wiring are also common. Re-flow solder or connect tear-away seams with electrical tape to repair breaks in the circuit.
Power Supply Issues
Inspect external power adapters and make sure the output voltage matches what the LEDs require. Look for damage to the transformer or wall plug. Sometimes the internal driver board fails, cutting off power to the strip. Test output voltage and consider replacing the power supply if it isn’t performing properly.
Troubleshoot a Dim or Unresponsive LED Strip Light
| Issue | Cause | Solution |
| LEDs only partially light or fade on/off | Replace the power supply or check for voltage drop along strip’s length | Weak solder joints or electrical resistance in the circuit |
| LEDs light dimly | Low power supply voltage output | Replace the integrated circuit or entire controller board |
| Only certain colors work | Individual LED chips or traces have failed | Try re-soldering or replacing the affected RGB section |
| LEDs flicker or strobe | Faulty integrated circuit drivers | Replace the power supply or check for voltage drop along the strip’s length |
Easily Replace Individual Burned-Out LEDs on Flexible Strips
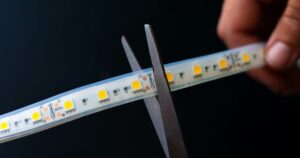
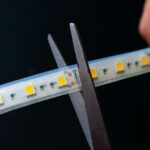
Rather than tossing out an entire LED strip due to a few dead lights, it’s possible to replace individual SMD (surface mount) LED chips. First, cut power to the strip and locate the burned-out LED under a magnifying glass. Use a hot air station or heat gun set to 350°F to carefully heat the chip until it lifts off. Replace with an exact match LED and re-flow the solder to secure it in place. Adhesive backing keeps the circuit intact during chip swaps so color and lighting functions are preserved.
Acquire Matching LED Components
Find the manufacturer and part numbers printed on the working areas of the strip to source calibrated replacement chips. LED suppliers offer matching type, voltage, and color alternatives to keep repairs transparent. Sometimes the integrated driver must also be replaced for a fully functioning repair.
Solder Techniques for DIY Installation
A temperature-controlled soldering iron set to 350-400°F and thin solder wire allows precise work. Apply flux before heating to draw molten solder into connections. Re-flow rather than applying fresh solder for a neat joint. Work quickly and take care not to damage surrounding traces with heat. Check continuity before powering up.
When Full Strip Replacement is Necessary
For heavily damaged sections or if multiple LEDs and traces are affected, full strip replacement may be more cost-effective than individual repairs. Cut away damaged areas carefully to install a factory-spliced patch strip or an entirely new lighting section in its place. Verify proper power, ground, and data connections before testing.
Fix Flickering or Unstable RGB LED Strips
Flickering RGB strips usually point to a loose or poor-quality solder joint interrupting the signal traveling between the controller and LEDs. Reflow all solder points with fresh solder, applying heat for only a few seconds to avoid damaging traces. Another cause can be signal interference – keep AC power wires separated from data lines. Use shielded cable if needed. Check for firmware updates too, as software bugs could potentially cause unstable color rendering.
The Pros and Cons of Bypass Cables for Unpowered LED Strips
Pros:
- Allows connection of additional unpowered strips to an existing controller/power supply
- Avoids integrated controller limitations on the max LED span
Cons:
- Introduces points of failure where the cable connects
- Signal quality loss over extended cable runs
- Adds expense of extra parts and installation time
Diagnosing and Fixing Intermittent or Erratic LED Strip Behavior
Intermittent issues are tricky but usually stem from loose connections, wiring damage, or component fatigue. Check for cracks in solder mask coating and reflow all joints. Gentle bending during installation can sometimes disrupt traces over time – inspect the PCB for cracks. Corroded wire ends are another possible culprit. Clean contacts and apply dielectric grease to protect connections from moisture and vibrations. Confirm proper voltages throughout to rule out intermittent power supply or signal driver faults.
When to Call in a Pro for Challenging LED Strip Repairs
For homeowners without electronics skills, some repairs may be beyond a DIY ability. Symptoms like random color shifting, unstable brightness control, or entire strip sections cutting in/out could point to issues with the controller printed circuit board itself. Integrated circuits are tiny and surface mount work requires specialized tools. Diagnosing component-level faults like blown MOSFETs or defective logic chips demands training. Considering a flat rate from an experienced technician may save time vs. frustration from replacements that don’t remedy the root problem.
Diagnosing Complex Circuit Board Issues
Problems stemming from the internal circuitry are challenging to pinpoint without diagnostic equipment like logic analyzers, oscilloscopes, and temperature sensors. Faults occur deep within ICs during high power switching cycles or due to latent defects.
Replacing Surface Mount Components
Fine-pitch SMD rework demands specialized hot-air tools. Even micro-soldering stations can damage neighboring components if not carefully done. Component selection and verifying correct part values afterward adds to the difficulty level.
Strips Behind Drywall or Inaccessible Areas

If installed in tight spaces with plenum-rated sheeting material, safe removal may necessitate localized drywall repair. Call a specialist if accessible for diagnosis before opening walls for strip replacement access if required.
FAQ’s
How do you fix a ripped LED strip light?
Solder torn connection points and sealed with insulating tape.
Why is my LED rope light not turning on?
Check connections, and power supply, and replace faulty components.
How do I get my LED strip lights to work again?
Verify power, secure connections, replace faulty LEDs, and fix any wiring issues.
Why are my LED strip lights not turning on?
Check power, and connections, and replace any damaged LEDs or faulty components.
Conclusion
With the right troubleshooting process and repair techniques, many issues with LED strip lights that refuse to illuminate can be identified and fixed without costly professional help or a full strip replacement. Taking your time to methodically test each component helps narrow the problem for focused fixes. When individual LEDs or solder joints are at fault, component swaps keep repairs practical. But don’t hesitate to consult a technician either for integrated circuits or multi-point faults that demand specialized skills. More often than not, your favorite colorful light shows can shine on again with some problem-solving.