12V LED lights to a switch refers to the process of connecting low-voltage LED lighting to a control switch. This allows users to turn the lights on or off at will. It’s a common DIY project used in vehicles and home decor to enhance lighting and create ambiance.
If you’re looking to add a touch of brilliance to your vehicle or living space, wiring 12V LED lights to a switch is the way to go.Here is a question erase “How to Wire 12V LED Lights to a Switch” With the right tools and know-how, you can create a stunning lighting setup that’s energy-efficient and long-lasting.
To wire LED lights to a switch, 12V LED lights connected to a switch provide versatile and energy-efficient lighting options for various applications. These lights operate on a 12-volt direct current (DC) power source, making them ideal for both automotive and home projects.
Key Takeaways
- Select appropriate LED lights, a compatible switch, and the correct wire gauge for a safe and efficient setup.
- Always disconnect the power source, wear safety gear, and double-check connections to prevent accidents.
- Use cable clips, label wires, and conceal wiring when possible for a tidy and professional installation.
- Ensure your LED lights work correctly before finalizing connections, and be prepared to troubleshoot issues if they arise.
- Inspect your installation periodically to identify wear and tear, ensuring the longevity and reliability of your lighting system.
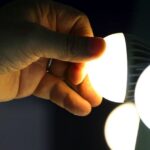
Understanding 12v LED Lights
Delving into the realm of 12v LED lights unveils a world of efficient and versatile illumination. Operating on a 12-volt direct current (DC) system, these lights are commonly used in automotive, marine, and off-grid applications. Their low voltage makes them energy-efficient, and their compact size allows for flexible installation in various settings.
Efficiency in Low Voltage Brilliance
Experience the pinnacle of illumination with “Efficiency in Low Voltage Brilliance.” This innovative lighting solution combines energy efficiency with low voltage, providing a brilliant and sustainable glow.
Whether enhancing your home or office space, the efficiency in low voltage brilliance ensures optimal performance, making it a smart choice for those seeking both environmental consciousness and superior lighting quality. Illuminate your surroundings with the perfect blend of efficiency and brilliance.
| Step | Description |
|---|---|
| 1. | Safety First – Turn off the power at the circuit breaker or fuse box to ensure safety during the installation. |
| 2. | Plan Your Wiring – Determine the locations for your 12V LED lights and the switch, ensuring convenient placement. |
| 3. | Mount the Switch – Install the switch following the manufacturer’s instructions, which typically involves attaching it to the wall and connecting it to an electrical box. |
| 4. | Mount the LED Lights – Install the 12V LED lights according to the manufacturer’s instructions, using brackets or clips to secure them in place. |
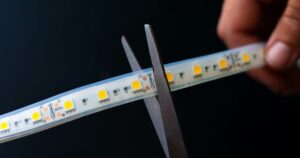
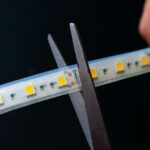
| 5. | Cut and Strip the Wires – Measure the distance between the switch and LED lights, cut the electrical wire to the appropriate length, and strip the ends of the wires using a wire stripper. |
| 6. | Connect the Wires (Switch End) – Connect the live (positive) wire to the “L” or “Live” terminal on the switch. Connect the neutral (negative) wire to the “N” or “Neutral” terminal on the switch. If there’s an earth wire, connect it to the earth terminal on the switch. |
| 7. | Connect the Wires (LED Lights End) – Connect the live (positive) wire to the positive terminal (+) on the LED light. Connect the neutral (negative) wire to the negative terminal (-) on the LED light. |
| 8. | Secure the Connections – Use wire connectors or terminal blocks to secure the wire connections, ensuring they are tight and well-insulated to prevent exposed wires. |
| 9. | Test the Setup – Turn the power back on at the circuit breaker or fuse box and test the 12V LED lights by toggling the switch. Confirm that they light up as expected. |
| 10. | Finish and Cleanup – Close up any openings in the wall, secure the switch cover plate, and tidy up any loose wires in a junction box or by bundling and concealing them safely. |
Safety Precautions
Safety precautions are paramount when working with electrical components. Prioritise wearing safety gear like gloves and safety glasses, disconnect the power source before any work, and double-check wiring connections to prevent short circuits and ensure a safe working environment.
Identify the Power Source
Identifying the power source is a crucial first step when wiring 12V LED lights to a switch. This involves determining where the 12V direct current (DC) power will originate from, whether it’s a vehicle’s battery or electrical system. Ensuring the correct voltage source is essential to match the LED lights’ requirements for a successful and safe installation.
Wiring the LED Lights
Wiring the LED lights is a crucial step in the process. It involves connecting the LED strips or bulbs to the chosen switch and ensuring that the wiring is secure and efficient. This step is pivotal to ensure that the LED lights function as intended and provide the desired illumination.
Common Mistakes to Avoid
When wiring 12V LED lights to a switch, there are common mistakes to avoid. One frequent error is incorrectly sizing the wire gauge, which can result in voltage drop, reducing the brightness of the lights.
Overloading the switch by connecting too many LED lights can also lead to issues. Furthermore, failing to secure connections properly may result in potential short circuits. It’s essential to pay attention to these common pitfalls to ensure a successful and safe LED lighting installation.
Tips for a Neat Installation

When it comes to wiring 12V LED lights to a switch, achieving a clean and tidy installation not only enhances the aesthetics but also ensures the longevity and functionality of your lighting system.
Use Cable Clips and Adhesive Clips:
To prevent wires from hanging loosely or getting entangled, make use of cable clips or adhesive clips. These handy accessories allow you to secure the wiring neatly along the chosen route.
Organize and Route Wires Properly
Take the time to organize and route your wires in a logical and orderly manner. Avoid bundling wires too tightly, as this can lead to overheating. Instead, aim for a clean and well-organized layout that keeps wires separated and avoids unnecessary strain.
Seal Connections with Heat Shrink Tubing
To protect your connections from moisture and external elements, use heat shrink tubing. It’s an excellent way to insulate and safeguard your connections, ensuring that they remain secure and free from potential corrosion. This is especially important for outdoor or automotive applications.
Regularly Inspect Your Installation
After completing the installation, periodically check your wiring to ensure that it remains in good condition. Look for any signs of wear, damage, or loose connections. Timely maintenance can extend the life of your LED lighting system.
Maintenance and Troubleshooting
Maintenance and troubleshooting are essential aspects of ensuring the consistent performance of your 12V LED lighting system. Regular maintenance involves inspecting your connections, wires, and LED lights for wear and tear, addressing issues promptly to prevent downtime.
Troubleshooting, on the other hand, allows you to diagnose and fix any problems that may arise, such as flickering lights or non-responsive switches. Both practices play a vital role in preserving the longevity and reliability of your LED lighting, ensuring that it continues to illuminate your surroundings effectively.
Conclusion
In conclusion, mastering the art of wiring 12V LED lights to a switch can be a rewarding and illuminating experience, whether you’re enhancing your vehicle’s lighting or adding a touch of brilliance to your living space. With the right components, safety precautions, and a systematic approach, you can transform your surroundings efficiently and aesthetically.
Remember to prioritise safety, maintain neat and organized installations, and stay vigilant with maintenance and troubleshooting. By doing so, you’ll enjoy the countless hours of reliable and eye-catching LED illumination, making your lighting project a true success.
FAQs
Are 12V LED lights suitable for my vehicle?
Yes, 12V LED lights are a popular choice for vehicles, as they consume less power and generate less heat, making them energy-efficient and safer.
Can I use a dimmer switch with 12V LED lights?
Yes, you can use a dimmer switch with 12V LED lights, but it’s important to select a dimmer switch compatible with LED lighting.
What is the maximum length of wire I can use for 12V LED lights?
The maximum wire length for 12V LED lights depends on the LED’s power consumption and the wire gauge. In general, shorter wires are more efficient for LED lighting.
Conclusion
In conclusion, mastering the art of wiring 12V LED lights to a switch can be a rewarding and illuminating experience, whether you’re enhancing your vehicle’s lighting or adding a touch of brilliance to your living space. With the right components, safety precautions, and a systematic approach, you can transform your surroundings efficiently and aesthetically.
Remember to prioritise safety, maintain neat and organized installations, and stay vigilant with maintenance and troubleshooting when wire 12V LED lights to a switch. By doing so, you’ll enjoy the countless hours of reliable and eye-catching LED illumination, making your lighting project a true success.