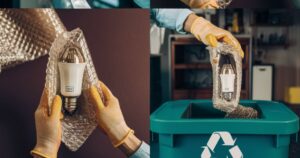
Fixing broken LED light strips involves repairing any physical or electrical damage to restore their functionality. This process may include identifying the point of breakage, gathering necessary tools, and using techniques like soldering for repair. Safety precautions, such as disconnecting power sources, are crucial during the repair.
We’ve got the hacks to bring back the glow. Here is a question erase “How to Fix Broken LED Light Strips” With simple tools and easy steps, you’ll be fixing it like a pro. Say goodbye to flickers and hello to a well-lit room. Let’s dive into the DIY magic and brighten up your space with a repaired LED light strip.
Fixing broken LED light strips is a straightforward process that anyone can tackle. First, assess the damage by identifying the point of breakage and checking power connections. Gather the necessary tools, including a soldering iron and replacement LEDs, and create a clean workspace.
Key Takeaways
- Successful repair begins with a precise diagnosis of the LED light strip’s damage, crucial for identifying the specific issue and determining the appropriate fix.
- Building a toolkit with essential tools like a soldering iron, solder wire, and a multimeter is vital for a smooth and effective repair process.
- Prioritizing safety and creating a clean, organized workspace minimizes risks and ensures a conducive environment for successful DIY repairs.
- Locating the exact point of breakage and conducting a thorough inspection helps uncover hidden issues, preventing future complications.
- Implementing preventive measures, such as proper handling and regular maintenance, empowers users to avoid LED light strip issues and extend their lifespan.
Understanding the Problem
Understanding the problem with a broken LED light strip is crucial for effective repair. Whether it’s physical damage, electrical issues, or manufacturing defects, identifying the root cause is the first step toward a solution.
By carefully assessing the type and extent of the damage, users can develop a targeted approach to address the issue. This knowledge not only facilitates a smoother repair process but also helps prevent future problems, ensuring the longevity and optimal performance of the LED light strip.
Step-by-Step Guide to Unplugging
In the “Step-by-Step Guide to Unplugging and Disassembling,” the crucial process of ensuring safety and proper disconnection is highlighted. Begin by responsibly unplugging the power source to prevent accidents during the repair.
With caution, disassemble the Make Your LED Lights Move components, taking note of their arrangement for seamless reassembly. This step is pivotal in the repair journey, laying the foundation for a thorough inspection and subsequent fixes to get your LED light strip back in working order.
| Step | Description |
|---|---|
| Assessing the Damage | Identify the type and extent of damage to the LED light strip. |
| Gathering Materials | Collect necessary tools and materials for the repair process. |
| Preparing the Workspace | Create a clean and organized workspace for a safe repair. |
| Unplugging and Disassembling | Safely disconnect power sources and disassemble the LED light strip components. |
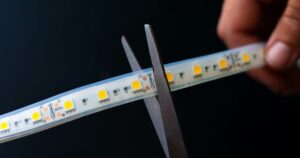
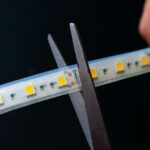
| Locating the Break | Thoroughly inspect the strip to find the exact point of breakage. |
| Repairing the Break | Use appropriate tools to fix the break, following step-by-step instructions. |
| Reassembling the LED Light Strip | Carefully put the components back together, ensuring proper alignment. Test functionality before finalizing. |
Soldering Techniques and Reassembly
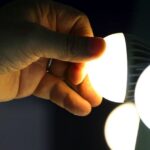
In the realm of fixing broken LED light strips, precision is paramount during the soldering and reassembly phase. Employing adept soldering techniques ensures a seamless repair process, allowing for the careful restoration of connections. Precision in reassembly guarantees the correct alignment of components, securing connections and paving the way for a successful repair.
By paying meticulous attention to these crucial steps, individuals can confidently breathe new life into their LED light strips, bringing light and vibrancy back to their spaces.
Causes of LED Light Strip Breakage

LED light strip breakage can occur due to various factors. Physical damage, such as bending or twisting beyond the strip’s capacity, is a common cause. Electrical issues, like power surges or incorrect voltage, can also contribute to breakage.
Manufacturing defects, though less frequent, may result in vulnerabilities over time. Understanding these causes is crucial for effective troubleshooting and repair, ensuring that users can address the specific issues leading to their LED light strip malfunction and prevent future occurrences.
Importance of Addressing the Issue Promptly
Addressing a broken LED light strip promptly is crucial to prevent further complications and maintain the overall functionality of the lighting system. Ignoring the issue can lead to more significant problems, such as damage to other components or a complete malfunction.
Timely attention allows for a quicker resolution, minimizing downtime and ensuring that your space remains well-lit. Taking prompt action not only saves time and resources but also prolongs the lifespan of the LED light strip, contributing to a more efficient and reliable lighting solution.
Preventive Measures
Addressing issues with broken LED light strips promptly is crucial to prevent further complications. Ignoring the problem can lead to more extensive damage, potentially affecting other components and reducing the overall lifespan of the lighting system. Timely intervention not only ensures the efficient functioning of the LED light strip but also minimizes the risk of additional repairs or the need for a complete replacement.
- Handle with care during installation and maintenance.
- Use compatible power sources and accessories.
- Regularly inspect and clean the LED light strip for potential issues.
Troubleshooting Tips
In the troubleshooting process, it’s essential to address common issues that may arise during the repair of broken LED light strips. Checking power connections for proper voltage, inspecting solder joints for any loose connections, and utilizing a multimeter to identify electrical problems are key troubleshooting tips.
- Check power connections and ensure proper voltage.
- Inspect solder joints for any loose connections.
- Use the multimeter to identify electrical issues.
FAQs
Can I use any soldering iron for LED light strip repair?
It’s recommended to use a soldering iron with adjustable temperature settings to avoid damage to the LED components.
How often should I inspect my LED light strips for potential issues?
Regular inspections every few months are advisable to catch and address any issues early on.
Can I replace individual LEDs, or do I need to replace the entire strip?
In many cases, individual LEDs can be replaced, saving you from having to replace the entire strip.
Conclusion
In conclusion, mending broken LED light strips is a manageable task with the right guidance and tools. By following the step-by-step repair process outlined above, users can restore functionality to their LED setups without the need for professional assistance. The emphasis on safety, thorough assessment of damage, and the use of appropriate tools ensures a successful repair.
Taking preventive measures and incorporating troubleshooting tips further empowers individuals to maintain and extend the lifespan of their Fix Broken LED Light Strips. With this knowledge, users can confidently address issues, illuminating their spaces with the renewed brilliance of properly functioning LED light strips.