In the 21st century, we have better options for everything, including LED strip lights that have replaced traditional incandescent bulbs.
LED strip lights consume less power, are more energy-efficient, and offer numerous other advantages. Sometimes you may not know exactly how long an LED strip you need to decorate a particular space.
In such cases, the ability to connect multiple LED strip lights becomes essential, allowing you to adjust the length and illuminate the desired area effectively.
This article provides an in-depth, step-by-step guide on connecting multiple LED strip lights safely and effectively. So, let’s dive into the world of LED strip light connections!
Can I Connect Multiple LED Strip Lights?
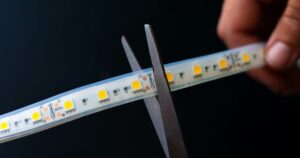
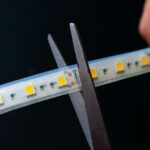
Yes, you can absolutely connect multiple LED strip lights together. Every LED strip has marked lines in the form of small dots, which indicate where you can cut the strip to adjust its length.
To join multiple strips, you can use connectors or solder them together at these cut points. It’s a relatively simple process!
You can connect a maximum of three LED strips to a single power supply unit (PSU). If you want to connect more than three LED strip lights, it’s best to use an additional power supply unit.
Is it Safe to Connect Multiple LED Strip Lights
Connecting multiple LED strip lights can be safe as long as you follow all the necessary safety measures. One of the most serious potential hazards is fire, which can occur if you use low-quality LED strip lights.
The reason for this is the use of low-quality materials that cannot withstand fluctuations in temperature and current. Even a slight variation in temperature can lead to a fire hazard.
Even if you use high-quality LED strips, there are still risks to be aware of:
- If multiple LED strips are operating under the same power supply, the total power consumption of all the strips should not exceed the total wattage of the power supply. Otherwise, it may cause the power supply to trip.
- The power supply unit must be compatible with the voltage and current requirements of the LED strips. For instance, if the LED lights require 12V DC, the power source must also be 12V DC, not 5V DC or 24V DC.
- Mounting the LEDs on plastic surfaces can cause problems.
- When connecting multiple LED strips, you need to determine whether they are connected in a parallel or series configuration and ensure that the power supply is compatible with this setup. This approach will help you avoid any serious risks.
Types of Connections for LED Strip Lights
There are two main ways to connect LED strip lights: parallel connection and series connection.
In a parallel connection, each LED strip has a separate connection to the power supply. This means that the current will be different for each LED strip, but the voltage will be the same.
The major advantage of a parallel connection is that if one strip fails to illuminate, it will not affect the other strips. All other strips will continue to function as expected.
In a series connection, the strips are connected end-to-end in a chain. Here, the current will be the same for all the strips, but the voltage will be different for each one. If one strip fails in a series connection, the power supply will not reach the other strips in the chain. As a result, all other strips will not light up.
It’s also important to note that LED strips connected in a parallel configuration will generally be brighter than those connected in series.
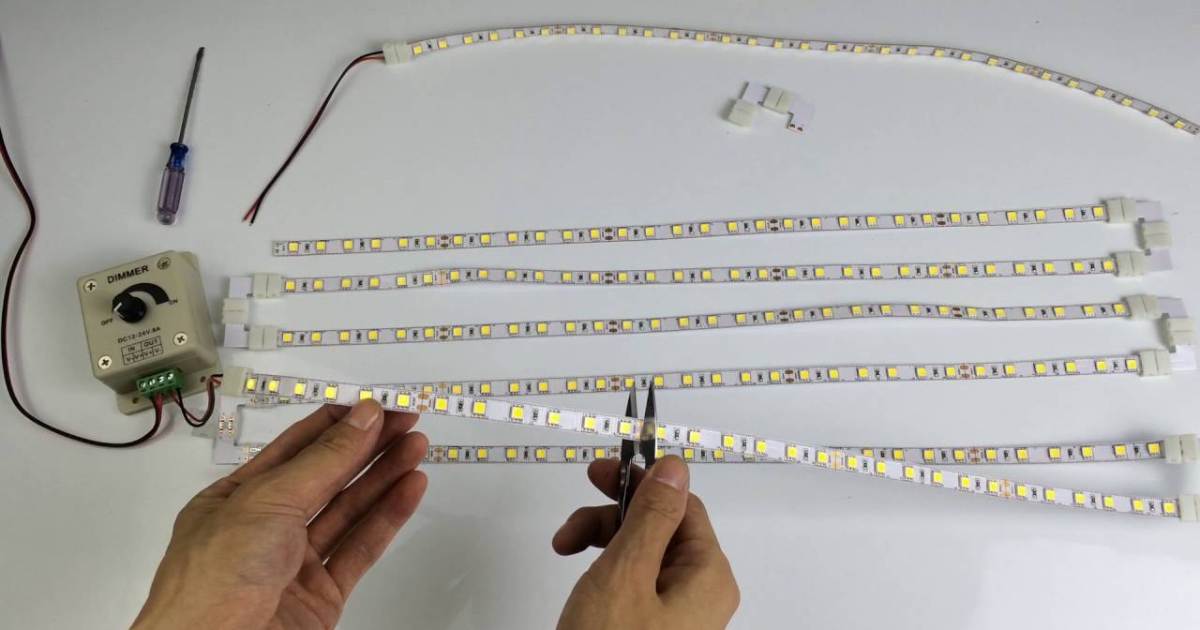
How to Connect Multiple LED Strip Lights Step-by-Step
There are two main methods for connecting multiple LED strip lights: using connectors or soldering the wires together. Let’s explore each method in detail.
Using a Connector
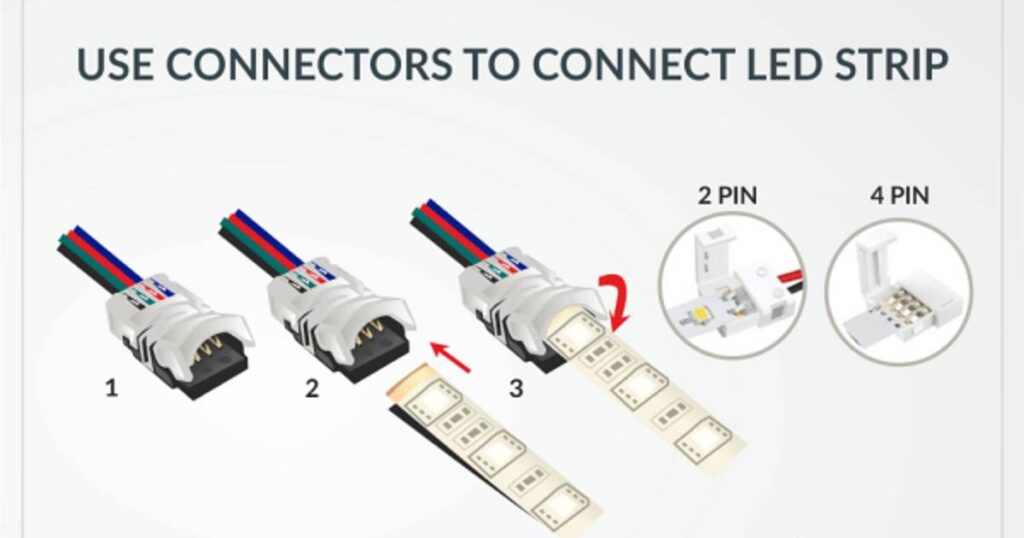
Before we dive into connecting the LED strip lights, it’s important to understand the types of connectors you can use. Here are the main options:
- Gapless Pin Connectors: Gapless pin connectors help you continue the connection between LED strip lights without any visible gaps, creating the appearance of a long, continuous chain of LEDs. These connectors typically have 2-5 pins.
- Jumper Cord Connectors: If you need to bend the LED strip lights, especially around walls where you need to make 90-degree turns, jumper cord connectors are the way to go. They feature a small, bendable wired gap between the multiple LED strip lights at each connection point.
Now, let’s go through the steps to connect multiple LED strip lights using a connector:
- Measure the desired length of your LED strip lights and determine where you want to cut them.
- Cut the LED strip lights along the dotted lines at the marked points.
- Ensure that the power, voltage, and current specifications for all the LED strip lights are the same. It’s generally better to connect LED strip lights from the same brand due to better compatibility.
- Decide whether you need a gapless connection or the ability to make 90-degree bends for your wall decoration.
- Use the relevant connector type to connect multiple LED strip lights.
- Test the lights to ensure they are working as expected.
Using Solder
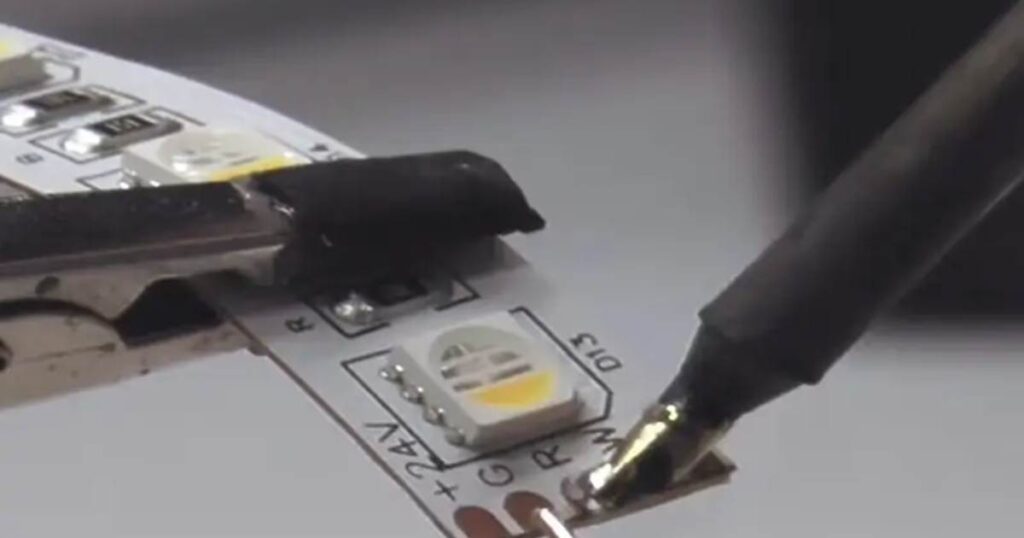
Soldering is a more technical but highly efficient method for connecting multiple LED strip lights. Here’s a step-by-step process for soldering LED strips:
- Locate the red and black colored wires of the LED strips.
- Use a wire stripper to remove the casing of the wires to expose a small portion of the bare wire.
- Heat your soldering iron to a temperature of around 350 degrees Fahrenheit (176.7 degrees Celsius).
- Carefully solder the exposed ends of the LED strips‘ wires together using the heated soldering iron.
That’s how you can use solder to connect multiple LED strip lights securely.
Advantages of Connecting Multiple LED Strip Lights
Connecting multiple LED strip lights offers several advantages:
- Adjustable Length for Any Space: If you’re unsure about the exact length required to illuminate a particular area, cutting and connecting multiple LED strip lights allows you to adjust the total length to fit your specific needs.
- Increased Brightness and Room Illumination: When you connect multiple LED strips, the brightness from each strip adds up, resulting in a significant increase in overall illumination. This is especially advantageous when using a parallel arrangement of strips.
- Ability to Light Up Large Areas: A single LED strip might not be enough to effectively illuminate a large space like a kitchen. Connecting multiple LED strips in a chain allows you to brighten a much larger area.
- Flexibility to Bend Strips Around Corners: If you need to bend the LED strips around corners or at 90-degree angles along walls, jumper cord connectors provide the ultimate flexibility to achieve this.
Connecting LED Strips to a Power Supply
There are several ways to connect LED strip lights to a power supply unit (PSU). One common method is a direct connection to a power socket. Another option is to use an LED strip splitter. Here’s how you can use an LED splitter to connect your LED strips to a power supply:
- Connect your LED strip lights to the wires on one end of the LED splitter. This allows you to create both parallel and series arrangements. Choose the connection type that best suits your needs.
- Plug the opposite end of the LED splitter into the power supply unit (PSU).
This is the basic mechanism for connecting your LED strip lights to a power supply. Here are some additional factors to consider:
- Check the power consumption of your LED strip lights. This information will help you determine the appropriate power supply to use.
- Choose a power supply that is compatible with the voltage and current requirements of your LED strip lights.
- As a safety measure, avoid putting 100% load on the power supply. Keep the number of LED strip lights in the chain within 80% of the maximum load capacity of the power supply.
Determining the Maximum Number of LED Strips
To determine the maximum number of LED strips you can safely connect to a single power supply, you can use the following formula:
Number of Strips = Power Supply Wattage / Power Consumption of One Strip
For example, if your power supply is rated at 500 watts and each LED strip consumes 100 watts, the maximum number of strips you can connect would be:
Number of Strips = 500 watts / 100 watts = 5 strips
It’s crucial not to put a 100% load on your power supply. As a general rule, aim for no more than 80% of the power supply’s maximum wattage to ensure safe operation. In the example above, it would be best to connect only 4 LED strips (80% of 5) to the 500-watt power supply.
Conclusion
Connecting multiple LED strip lights provides numerous benefits, such as adjustable length, increased brightness, the ability to illuminate large areas effectively, and flexibility to bend the strips around corners.
By following the steps outlined in this guide and adhering to safety measures, you can create a versatile and visually stunning lighting setup that meets your specific needs.
So, don’t hesitate to try connecting multiple LED strips and enjoy the advantages of brighter, more adaptable LED lighting!