Connecting LED lights is easy without soldering or buying connectors. You likely already have the few supplies needed at home. To start, gather some LED lights and conductive copper tape. Also have wire strippers and scissors on hand plus a battery or power source. Cut the LED wires so they are equal lengths. Cut small copper tape squares and place on the wire ends to create flat, sticky surfaces.
Space out and stick LEDs onto two longer pieces of copper tape in your desired pattern, alternating positive and negative leads. This sticks them together in series. Finally, expose your battery wires with strippers and tape them to the LED strip ends to complete the circuit. The conductive tape lets power flow from one LED to the next, eliminating solder and connectors.
With just basic supplies, some clever taping allows limitless lighting designs, providing a fun lighting project. In this guide, we’ll provide step-by-step instructions. Learn how to effortlessly connect LED lights for a continuous and dazzling display.
Skip the Soldering: Easy Ways to Connect LED Strips
Soldering LED strips can be tricky. Luckily, there are simpler connector-free methods for linking LED strips to create bright and custom lighting designs.
Use Conductive Copper Tape
Copper tape with conductive adhesive allows current to flow between LED strip ends when stuck together correctly. Simply peel off backing paper and apply the strong adhesive copper strip directly onto the positive and negative wires in opposite patterns.
Attach Wires with Wire Nuts
LED wires can be twisted together securely inside wire nut shells. Make sure positive wires connect only to other positive wires when twisting multi-colored strips together. Properly joining the copper interior allows electricity to jump between the LED strips.
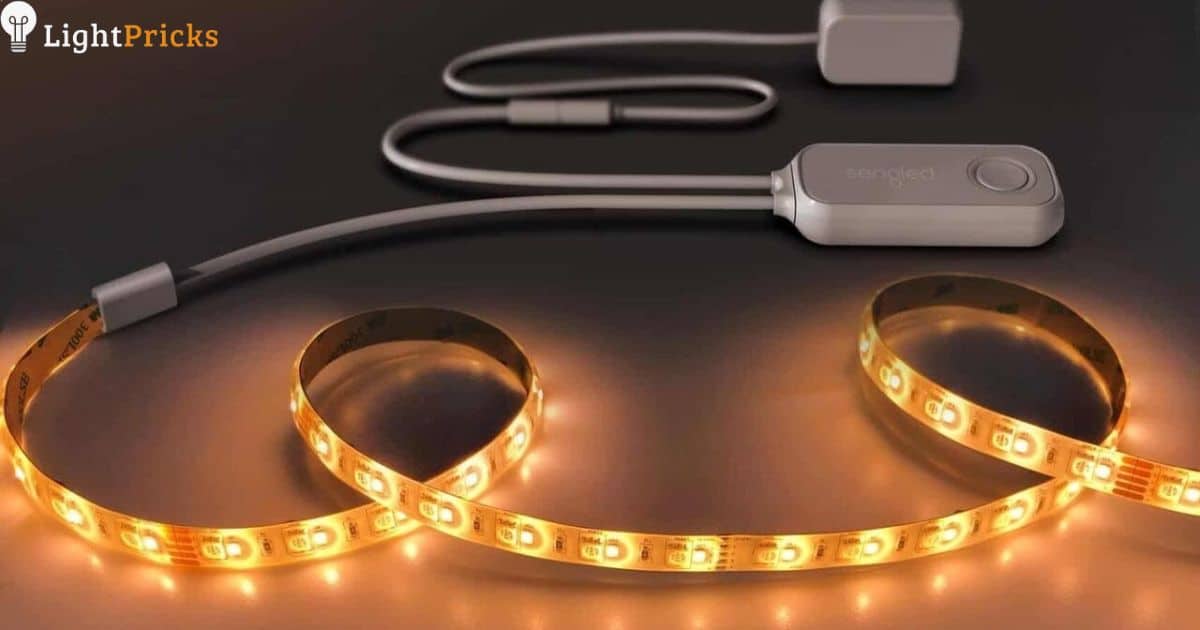
Leverage Power Supply Adapters
Specialized LED power supply connectors with adhesive backing can stick multiple LED strip ends to its terminals without soldering. Always check voltage compatibility first. Connect color-coded wires properly for safe operation.
Think Outside the Box
Get creative by tapping into the conductive metal frames of household objects like aluminum tracks, copper piping, or steel shelving to channel electricity to spaced out LED strips. Polarity still matters, so mind wire colors.
With the right techniques, anyone can install dazzling LED arrays on a budget and without technical skills or connectors.
Advantages of Joining LED Strips Without Soldering
Going solderless when connecting LED strips unlocks several helpful gains beyond just easier installation.
Lower Fire Risks
With no open flames or high heat tools needed, the fire danger is greatly reduced for beginners and children. Cool connections are safer connections.
Minimize Damage
Expensive LED electronics stay protected without excess heat exposure during electrical joins. The lighting remains undamaged for longer-lasting operation.
Improve Durability
Bonds made with purpose-made connectors or copper adhesive withstand vibration better by absorbing shocks. They won’t crack over time like brittle solder.
Enhance Flexibility
Bendable tape or wire shell connections enable LED shape changes on demand. Curvy light paths become achievable with adaptable wiring methods.
Easy to Disassemble
Parts swap out individually when links aren’t permanently fused, thanks to accessible connector designs meant for repetition. Mix and match color segments. The perks of fastening LED strips without solder are clear – safer, reliable lighting crafting.
Simple Methods for Connecting LED Strips Without Using Solder
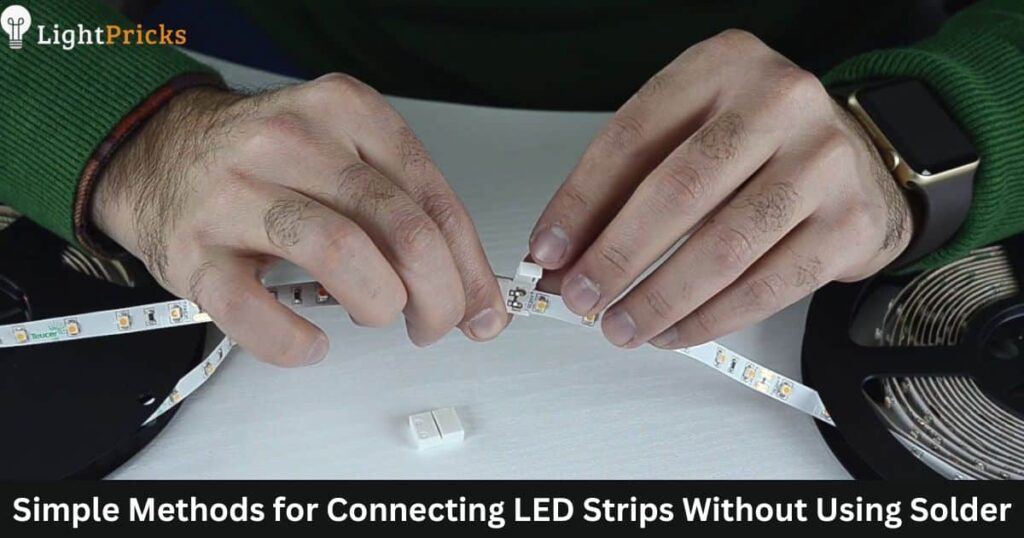
Skip frustrating soldering. Use these basic no-tools techniques instead to light up any space creatively.
Twisting Wires Together
Expose flexible wire leads by stripping off about half an inch of plastic coating. Simply twist positive to positive and negative to negative wires from separate LED strips until tightly spun together. Wrap waterproof tape around each junction.
Conductive Copper Taping
After snipping LED wires evenly, cut copper strips and stick over top each LED wire end. Then place longer pieces of conductive tape where desired and press LEDs down in alternating polarity patterns to link strips.
LED Terminal Blocks
Similar to electrical junction boxes, terminal blocks offer clearly marked screw terminals for joining solid-core wire ends without twisting. Use a screwdriver to clamp varied gauge wires tightly together within the box.
Specialty Connector Cables
Look for LED power connector cords with built-in terminals designed especially for branching LED light strips off one centralized power supply. Plug like wires together via simple push pins or twisting mechanisms for quick connects.
Extension Cable Splitters
Sometimes combining LED strips takes nothing more than plugging their male DC barrel jacks into a basic multi-head current splitter wired to a single extender cable from the transformer. Simple!
With the help of pass-through wiring methods above, beginners can forget soldering and start enjoying lighting projects faster.
Parallel Connection
Wiring LED strips in parallel evenly distributes voltage while allowing independent operation if one segment fails. Carefully branch positive to positive and negative to negative wires between power source and LED strips using wire nuts. Insulate with electrical tape. Provides backup lighting.
Using Gapless Pin Connector
Gapless pin connectors neatly join cut points on flexible LED strips without visible separation. They act like modular bricks with embedded male and female ports that insert and snap together. Polarity markers take the guesswork out of proper orientation. Create seamless backlighting.
Using Jumper Cord Connector
Jumper cord connectors are handy barrel-shaped adapters prewired between short cables. They transition between detached LED strip segments via simple unplugging and plugging of DC jacks. Combine various prefab lighting sets into one synchronized longer strip quickly. Offer plug and play connections.
Procedure: Connecting LED Strips Without Soldering Using a Connector
Connect LED strips without soldering by inserting the strip ends into a connector. Align the connectors, ensuring the positive and negative terminals match. Securely close the connector, providing a hassle-free and solder-free method for illuminating your space with vibrant LED lighting. Here, we will discuss step by step process to connect LED strips without soldering using a connecter:
Gather the Necessary Items
Gathering the right supplies upfront makes LED strip projects flow smoothly. Having on hand LED tape rolls, connector cables, wire strippers, measuring tape, mounting hardware, and a 12V DC power supply with enough wattage for the length of lights avoids frustrations. Ensure connectors match LED strip widths and voltage or customize adapters.
Acquire the LED Strips
For beginners, manageable one foot segments of LEDs allow practice with essential techniques before tackling intricate designs. Determine desired placement locations when retrieving strips and sketch out plans. Consider spacing and angles of bent tape. Prepare more footage than measurements to accommodate errors and redoing.
Assess the Dimensions of the LED Strips
Precisely measuring and marking cut lines transforms random guesswork into perfectly sized LED arrays. Lay strips across the project surface and mark intersecting edges with pencil at the copper dots. Space out marks evenly for consistent lighting. Account for connectors adding length when dimensioning. Label each strip’s polarity.
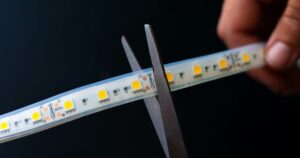
Trim to Suitable Dimensions
Sharp flush cutters slice LED strips cleanly on marks for fracture-free connections later. Ensure cuts fall between solder dots to maintain positive and negative circuit path divisions after reconnecting. Discard any strips with damaged thin traces or dangling wires.
Link the Strips Using a Connector
Match arrow indicators on connector ports with LED strip polarities when inserting freshly cut ends until tightened securely. Gently tug wires to verify proper assembly then attach additional segments utilizing pre-wired jumper cords between each piece.
Install Power Supply
Finally, link 12V power supply red wire to any open positive LED port and black wire to negative port for instantly illuminated strips! Check for dark spots and recheck connections if present. Turn down brightness if satisfied. Additional linking is effortless for further expansion.
How to Connect Multiple LED Strips to one Power Source?
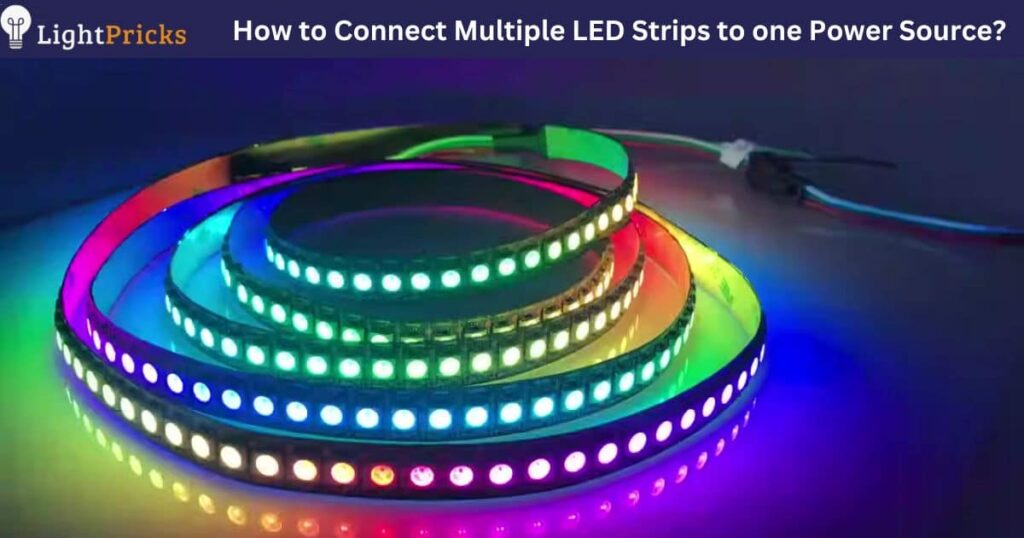
When wiring several LED strip lights to a single transformer, calculations help prevent overloading. Determine the total length in feet of all strips first. Most standard 12V power supplies safely handle around 10 feet or 60 watts before maxing out. Exceeding rated outputs risks dangerous shorts and burns out components quickly.
Luckily, connecting additional strips is straightforward using basic splitter cables. Purchase a DC power jack splitter with multiple female outlets to plug strips into off one male lead. Combining parallel and series circuits splits amperage evenly across added lights. Stick with identical LED tape to synchronize voltages correctly.
Another option utilizes terminal block connectors. Available affordably online, terminal blocks offer screw-down ports to join positive wires together and negative wires separately within plastic boxes. Insulate connections with included covers and mount vertically on surfaces to safely channel current to long lighting arrays in sequence.
When tapping multiple LED strips into the same transformer, checking polarity and not overloading amperage capacity preserves lifetime operation. Properly dividing wattage prevents wasted investments. While solderless wiring requires minimal skill, take care when handling exposed conductors. Following basic electrical safety fundamentals allows even novices to illuminate any space stylishly.
How to Connect LED Lights together after Cutting them?
Cutting LED strips lets you install perfect lighting lengths, but those exposed ends need reconnecting. Luckily, various connector methods exist to span gaps left between separated LED tape pieces.
Start by prepping each severed end. If wires are exposed during cutting, be sure to insulate with electrical tape to prevent dangerous shorts. Trim strips at copper solder dots to maintain positive and negative continuity inside.
Next, plug prepared ends into polarity-matched ports on gapless pin connectors until locked in place. Arrow icons correctly orient the male and female fittings. The pins bridge LED circuits internally, eliminating dark spots.
Alternatively, attach jumper cord cables between cut LED strips to reconnect the flow of electricity. The barrel connectors act as adapters with male plugs feeding into female jacks. Pay attention to positive and negative sides.
For permanent connections, conductive copper tape also works great. Simply overlay the tape strips adhesive-side down across cut wire leads, then adhere LED strips atop a longer grounded tape strip laid out.
With various plug and play connector styles, reestablishing illumination after slicing LED lights is convenient and requires no technician skills or tools. Properly insulating wires prevents unsafe exposed voltage.
How to Connect LED Lights without Plug?
Plugless lights seem complicated to electrify. However, simple household items conduct electricity to connect LED strips creatively. Aluminum trims painted black can substitute as tracks. Run positive and negative wires along cut grooves. Use strong tape to hold them separate and stick down LEDs, contacting one wire lead to each side. Or, drive small screws partway into a wood board and trace out a shape.
Twist exposed wires from an LED strip onto screws, spacing out more lights. Ensure positive and negative wires attach to different screws. Lastly, copper pipes or metal sheets like steel mesh can channel current to LED strips bonded correctly with electrical tape without a plug. With common conductors and insulated attachments, power flows inventively.
How to Connect Two Sets of LED Lights Together?
Combining separate LED lighting sets creates expansive custom arrays. Luckily various connector types simplify linking two identical strip types end-to-end or in parallel.
For end-to-end connections, use gapless pin connectors. These modular ports bridge small gaps between LED tape cuts. Match the arrow types and insert until the pins click and hold firm. Gapless lighting results.
Connecting LED sets in parallel requires splitting the power source into multiple outputs. Attach splitter cables to the 12V transformer outlet which accepts two DC power jack plugs from each LED set simultaneously.
Alternatively, an LED terminal block connector box parallel joins wires manually. Unscrew ports to insert matched colors on strip wires then tighten terminal screws over both. Close the insulating cover.
With the right wiring method for the job, augmenting LED lights is made simple without technical skills for spreading brightness farther.
Frequently Asked Questions
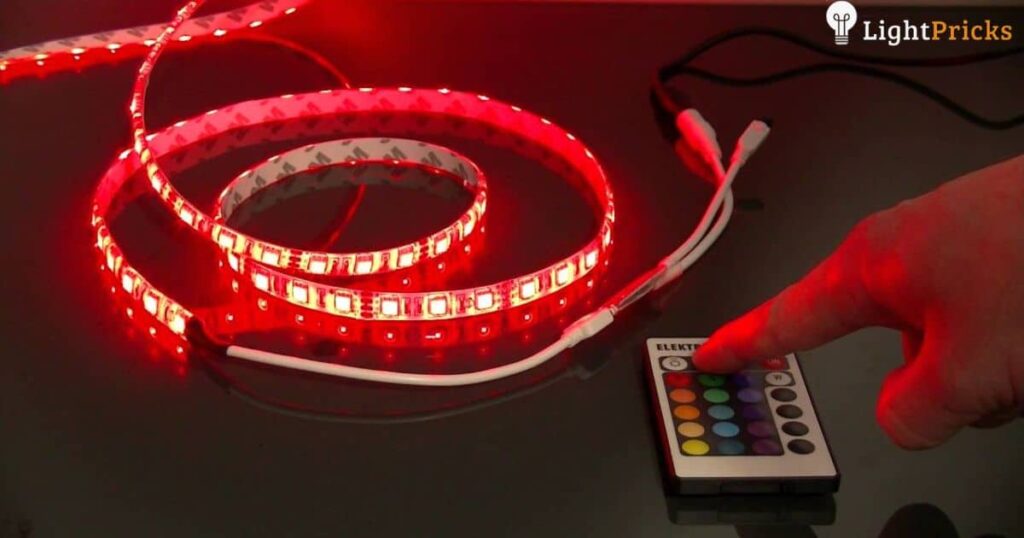
How do you connect two LED strips together without soldering?
To connect LED strips without soldering, use polarity-matching wire nuts, conductive copper tape, gapless pin connectors, or DC jumper cables between cut strips.
How do you use LED lights without a plug?
LED lights work without plugs by attaching wires directly to conductive materials like aluminum, steel, copper piping, or wires screwed into wood which replaces track lighting when tapped correctly.
How do you connect multiple LED lights together?
Connecting several LED lights together involves using terminal blocks, splitter cables, longer strips of copper tape, or end-to-end modular connectors that join each light in series or parallel.
How do you fix a cut LED light without soldering it?
To fix a cut LED strip without soldering, trim any frayed wires, insulate with electrical tape, re-expose just the ends, then reconnect continuity using gapless pin connectors or conductive copper adhesive strips.
Conclusion
The key to linking LED strip lights without soldering is leveraging conductive tape, household metals, wire nuts and modular connectors to safely channel electricity between cut wires. Simple copper adhesive strips join severed circuits when affixed properly in alternating polarities. Aluminum trims or steel meshes electrically substitute for track lighting. Barrel connectors plug separated strips together like puzzle pieces, while screw terminal blocks parallel connect using manual wire twists.
With various plug-and-play wiring tricks, beginners can install professional LED arrays on budgets creatively. Proper precautions are still needed when handling live voltage, but with clever conductive joining methods, lighting projects become accessible to all skill levels without risky soldering. Innovative yet straightforward connections make custom LED installations possible.