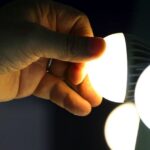
Curing Sally Hansen Miracle Gel with LED light involves using a specialized lamp to speed up the drying process. After applying the Miracle Gel color coat, each nail is exposed to the LED light for a designated time. This exposure activates the gel’s photoinitiators, causing it to harden and set, creating a long-lasting and chip-resistant finish.
Unlock the secret to a quicker, salon-quality manicure at home cure your Sally Hansen Miracle Gel with LED light.here is a question erase “Can You Cure Sally Hansen Miracle Gel with LED Light?” Say goodbye to lengthy drying times and hello to a vibrant, long-lasting finish. With the magic of LED technology, your nails will be ready in minutes, showcasing the brilliance of Miracle Gel’s diverse color palette.
Curing Sally Hansen Miracle Gel with an LED light is quick and easy. After applying the color coat, place your nails under the LED light for the recommended time. This activates the gel, ensuring a durable finish. Complete the process with the Miracle Gel topcoat, and voilà – enjoy a long-lasting, salon-quality manicure in the comfort of your home.
Key Takeaways
- LED light offers a quicker and energy-efficient curing process for Sally Hansen Miracle Gel, reducing the overall drying time and providing a faster, salon-quality manicure at home.
- Many formulations of Sally Hansen Miracle Gel are designed to be compatible with both UV and LED curing methods, giving users flexibility in their choice of curing equipment.
- The integration of LED light contributes to a longer-lasting, chip-resistant manicure, ensuring your vibrant colors stay intact for an extended period.
- Understanding the molecular changes during curing reveals that LED light, with its specific wavelength, activates the gel’s photoinitiators, resulting in a hard and durable finish.
- Following recommended application techniques, curing times, and utilizing proper LED light settings are crucial for achieving the best results with Sally Hansen Miracle Gel and LED curing.
Understanding Sally Hansen Miracle Gel
Understanding Sally Hansen Miracle Gel is essential for achieving a flawless at-home manicure experience. This innovative gel, renowned for its vibrant colors and durability, simplifies the nail care routine with its two-step application process.
By comprehending the unique features of this gel, users can optimize their results and ensure a chip-resistant, long-lasting finish. From its compatibility with LED lights to the science behind the curing process, a deeper understanding of Sally Hansen Miracle Gel sets the stage for a salon-quality manicure in the comfort of one’s own home.
The Role of LED Light in Curing Nail Gels
The role of LED light in curing nail gels is pivotal for achieving a durable and chip-resistant manicure. Unlike traditional UV lamps, LED lights offer a quicker and more energy-efficient curing process.
When exposed to the specific wavelength of LED light, photoinitiators in the nail gel activate, initiating a molecular reaction that results in a hardened and resilient finish. This efficient curing method not only saves time but also contributes to the long-lasting quality of the manicure, making it a preferred choice for at-home nail enthusiasts.
| Aspect | Information |
|---|---|
| Product Name | Sally Hansen Miracle Gel |
| Curing Method | LED Light |
| Cure Time | Typically 30 seconds to 1 minute per layer |
| Compatibility with LED Light | Yes |
| UV Light vs LED Light | Designed to work with LED light; also compatible with UV light |
| Benefits of LED Light Curing | Faster curing time, energy-efficient, longer-lasting results |
| Instructions for LED Curing | Apply the Miracle Gel color coat, cure with LED light, repeat |
| Additional Tips | Ensure even application, use recommended Miracle Gel top coat |
| Results and Durability | Extended wear, glossy finish |
Sally Hansen Miracle Gel and LED Light Compatibility
Ensuring a seamless manicure experience, Sally Hansen Miracle Gel exhibits remarkable compatibility with LED lights. This dynamic pairing brings efficiency to the curing process, allowing users to enjoy a quick and effective at-home manicure.
Before delving into the curing process, it’s essential to verify the compatibility of the specific Miracle Gel formulation with Cut Govee LED Lights, ensuring optimal results and a lasting, chip-resistant finish. Discover the perfect synergy between this innovative gel and the convenience of LED light for a salon-worthy manicure at your fingertips.
Steps to Cure Sally Hansen Miracle Gel with LED Light
To cure Sally Hansen Miracle Gel with an LED light, follow these simple steps: First, prepare your LED lamp, ensuring it’s clean and functional. Set the timer according to the gel’s recommendations, cure each nail individually, apply the topcoat, and finish by cleaning any residue for a flawless finish.
- Prepare Your LED Lamp: Ensure your LED lamp is clean and functioning correctly.
- Set the Timer: Most LED lamps come with timers. Set it according to the gel’s curing time recommendations.
- Cure Each Nail: Place your painted nails under the LED light, one at a time, for the specified duration.
- Apply Topcoat: Once cured, apply the Miracle Gel topcoat and cure it under the LED light.
- Finish with Cleanser: Wipe away any residue with a cleanser or rubbing alcohol for a flawless finish.
Benefits of Using LED Light for Sally Hansen Miracle Gel

The benefits of using LED light for Sally Hansen Miracle Gel are twofold. Firstly, LED lights significantly reduce curing time, providing a faster and more time-efficient manicure experience. Secondly, this method contributes to longer-lasting results, enhancing the chip-resistant nature of the Miracle Gel.
The specific wavelength of LED light activates the gel’s photoinitiators, ensuring a thorough and efficient polymerization process that leaves nails with a durable and vibrant finish. Say goodbye to long waiting times and hello to a manicure that stands the test of time.
Tips for Efficient Curing
When aiming for efficient curing of Sally Hansen Miracle Gel using an LED light, meticulous attention to application details is key. Start by applying thin, even coats to facilitate optimal light exposure.
Additionally, adhere to the recommended settings of your LED lamp to ensure the precise wavelength for effective curing. By mastering these tips, you enhance the curing process, ensuring a quicker and more durable result for your at-home manicure.
- Proper Application Techniques: Apply thin, even coats for optimal curing.
- Recommended LED Light Settings: Follow the recommended settings for your specific LED lamp to ensure efficient curing.
Alternative Curing Methods
In the realm of nail care, exploring alternative curing methods offers flexibility and options beyond traditional UV or LED lights. Understanding the distinctions between UV and LED curing methods empowers users to choose the technique that aligns with their preferences.
Additionally, for those who prefer a more natural approach, the paragraph discusses the feasibility of using sunlight as an alternative curing method, providing a holistic perspective on achieving the perfect manicure.
Taking Care of Your Miracle Gel Manicure
Taking care of your Miracle Gel manicure is essential for maintaining its longevity and vibrant appearance. After curing, avoid exposing your nails to harsh chemicals or excessive moisture immediately. Consider using gloves for chores to protect your manicure.
Moisturize your cuticles regularly to keep them healthy and prevent any chipping or peeling. By incorporating these simple care tips into your routine, you can enjoy your flawless Miracle Gel manicure for an extended period.
DIY Gel Manicure Troubleshooting
Navigating the world of at-home gel manicures can sometimes lead to unexpected challenges. From uneven application to the dreaded appearance of bubbles, troubleshooting becomes an essential skill for the DIY enthusiast.
In the realm of DIY Gel Manicure Troubleshooting, quick fixes abound. Learn to address common issues with finesse, ensuring your at-home manicure stays flawless and frustration-free. Discover simple solutions that can salvage your manicure and keep your nails looking salon-worthy with minimal effort.
FAQs
Can any LED light cure Sally Hansen Miracle Gel?
It’s recommended to use an LED light that meets the product’s specifications for optimal results.
Can I use UV light instead of LED to cure Miracle Gel?
While some formulations may be compatible, LED light is generally preferred for quicker and more energy-efficient curing.
Are there specific steps to follow when curing with LED light?
Yes, follow a step-by-step guide, including preparing the LED lamp, setting the timer, and curing each nail individually.
Conclusion
In conclusion, the compatibility of Sally Hansen Miracle Gel with LED light emerges as a game-changer for at-home manicures. The efficient curing process, coupled with the benefits of quicker drying times and long-lasting results, makes LED light a valuable tool in enhancing the gel’s performance.
Understanding the science behind the process and adhering to recommended application techniques ensures optimal outcomes. With the right precautions and a commitment to safety, the marriage of Cure Sally Hansen Miracle Gel with LED Light presents a convenient and effective solution, empowering individuals to achieve salon-quality manicures in the comfort of their own homes.